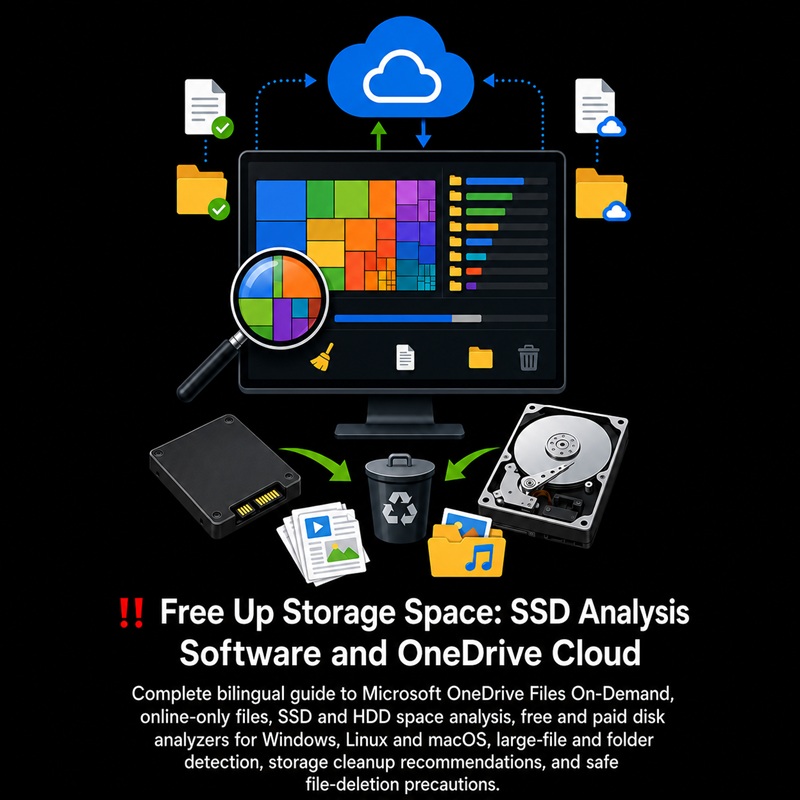
2026 08 25: Free Up Storage Space: SSD Analysis Software and OneDrive Cloud
———————————
———————————
‼️‼️ https://pastebin.com/u/LeGamerInfini
‼️‼️ LAST UPDATE 2026 08 24
‼️‼️ THANK YOU VERY MUCH.
———————————
———————————
–
‼️ Free Up Storage Space: SSD Analysis Software and OneDrive Cloud ‼️THANK YOU‼️
–
———————————
———————————
–
—
–
– SUBTITLE
–
– Complete bilingual guide to Microsoft OneDrive Files On-Demand, online-only files, SSD and HDD space analysis, free and paid disk analyzers for Windows, Linux and macOS, large-file and folder detection, storage cleanup recommendations, and safe file-deletion precautions.
–
—
–
———————————
———————————
———————————
———————————
–
—
–
– IN ENGLISH:
–
—
–
– INTRODUCTION
–
– This document is a complete bilingual guide to managing storage space, identifying large files and folders, and safely freeing space on SSDs, HDDs, and other storage devices without unnecessarily deleting important data.
–
– It begins with a practical guide to Microsoft OneDrive Cloud and Files On-Demand, explaining how to keep files and complete folders available online only while removing their local copies from an SSD. It explains synchronization verification, the “Free up space” option, the important difference between freeing space and deleting a file, OneDrive file-status icons, what happens when an online-only file is opened again, and why important files should still have an independent backup.
–
– The document then covers free and paid disk-space analysis software for Windows, Linux, and macOS. The featured tools include WizTree, TreeSize Free and its paid editions, WinDirStat, FolderSizes, Filelight, GNOME Disk Usage Analyzer / Baobab, ncdu, GrandPerspective, OmniDiskSweeper, and DaisyDisk. Their main functions, platforms, official websites, downloads, licensing options, and recommended uses are presented to help users choose the most appropriate solution.
–
– It also provides operating-system-specific recommendations, a practical method for analyzing a Windows PC, examples of folders and file types that commonly consume large amounts of storage space, and important precautions before deleting files. Special attention is given to Windows system locations and files such as Windows, Program Files, ProgramData, AppData, pagefile.sys, hiberfil.sys, WinSxS, and Windows Installer, which should never be removed simply because a disk analyzer reports that they occupy significant space.
–
– The purpose of this document is to provide a practical and safer approach to recovering storage capacity: first determine what is using the space, then decide whether files should remain local, be moved to online-only OneDrive storage, be archived, or be safely removed. The disk-analysis tools described here are intended to analyze storage usage and locate large files and folders; they do not replace SMART monitoring or dedicated SSD health-diagnostic software.
–
—
–
———————————
———————————
———————————
———————————
–
—
–
– IN ENGLISH:
–
—
–
– PREAMBLE
–
—
–
– ‼️ Microsoft OneDrive Cloud: Keep Files Online Only and Free Up SSD Space ‼️
–
– Yes, this is possible, and this is exactly what OneDrive’s “Files On-Demand” feature is designed for.
–
—
–
—
–
– [1] THE EASIEST METHOD
–
—
–
– 1] First, make sure that your file is actually located inside your OneDrive folder.
– Example:
– C:\Users\[Your name]\OneDrive\Documents\MyFile.zip
–
– 2] Wait until OneDrive has completely synchronized the file with the Cloud.
–
– 3] For additional safety, you can also open:
– https://onedrive.live.com/
–
– 4] Verify that the file is present in your OneDrive online.
–
– 5] In Windows File Explorer, go back to your OneDrive folder.
–
– 6] Right-click the file or folder concerned.
–
– 7] Choose:
– “Free up space”
–
– On some Windows 11 configurations, this command may be located in the OneDrive menu or in the additional options of the context menu.
–
– 8] OneDrive then removes the full local copy of the file stored on your SSD.
–
– 9] THE FILE IS NOT DELETED FROM ONEDRIVE.
–
– 10] It remains visible in File Explorer, but becomes an online-only file.
–
– 11] A small BLUE CLOUD icon should appear next to the file.
–
– BLUE CLOUD = file available online only.
– It uses practically no storage space on your SSD.
– It will be downloaded automatically if you open it again.
–
—
–
– [2] VERY IMPORTANT: DO NOT USE “DELETE”
–
—
–
– You must choose:
– “Free up space”
–
– You must NOT choose:
– “Delete”
–
– If you normally delete a file located inside your OneDrive folder, OneDrive synchronizes that deletion and the file may also be deleted from the Cloud.
–
– “Free up space” is different:
– the file remains in OneDrive;
– only its full local copy is removed from the SSD.
–
—
–
– [3] HOW TO RECOGNIZE THE FILE STATUS
–
—
–
– BLUE CLOUD:
– Available online only.
– This is the status you want when your goal is to save SSD space.
–
– GREEN CHECK MARK:
– The file has been downloaded and is currently available locally.
– It therefore uses space on the SSD.
–
– SOLID GREEN CIRCLE WITH A WHITE CHECK MARK:
– “Always keep on this device” is enabled.
– The file must remain downloaded on your SSD.
– This is therefore NOT the option to use when you want to save space.
–
—
–
– [4] IF THE FILE IS NOT YET IN ONEDRIVE
–
—
–
– Here is the method I recommend to avoid any data loss:
–
– 1] First copy the file into your OneDrive folder.
–
– 2] Allow OneDrive to completely finish uploading the file.
–
– 3] Go to:
– https://onedrive.live.com/
–
– 4] Verify that the file is really present and accessible online.
–
– 5] Then return to File Explorer.
–
– 6] Right-click the file.
–
– 7] Click:
– “Free up space”
–
– 8] Verify that the icon changes to a blue cloud.
–
– At that point, the file is kept in OneDrive and its full local copy no longer takes up space on the SSD.
–
—
–
– [5] YOU CAN DO THE SAME THING WITH AN ENTIRE FOLDER
–
—
–
– You do not have to do this file by file.
–
– For example, if you have a folder:
– OneDrive\Archives
–
– containing 100 GB of files:
–
– right-click “Archives”;
– then choose:
– “Free up space”
–
– OneDrive can then make the files in that folder available online only and recover a large part of those 100 GB on your SSD.
–
—
–
– [6] BE CAREFUL WHEN YOU OPEN THE FILE
–
—
–
– If you open a file represented by the blue cloud, OneDrive must download it so that Windows or your software can use it.
–
– It then becomes locally available again and starts using SSD space again.
–
– Once you have finished using the file, you can again:
– right-click it;
– choose “Free up space”.
–
– It will return to the “online-only” state.
–
—
–
– [7] CHECK THAT “FILES ON-DEMAND” IS ENABLED
–
—
–
– On current versions of OneDrive, “Files On-Demand” is normally enabled by default.
–
– If “Free up space” does not appear:
–
– 1] Click the OneDrive icon in the Windows notification area.
–
– 2] Open OneDrive Settings.
–
– 3] Go to:
– “Sync and backup”.
–
– 4] Open the advanced settings.
–
– 5] Check the options related to “Files On-Demand” and disk space management.
–
—
–
– [8] PRACTICAL EXAMPLE
–
—
–
– Imagine that you have:
– MyArchive.zip
–
– Size:
– 80 GB.
–
– Initial state:
– file stored in OneDrive;
– file also downloaded to your SSD;
– approximately 80 GB used locally.
–
– You do:
– right-click MyArchive.zip;
– “Free up space”.
–
– Result:
– MyArchive.zip remains in your OneDrive account;
– MyArchive.zip remains visible in File Explorer;
– a blue cloud icon appears;
– the 80 GB of local data can be freed;
– if you want to use the file later, OneDrive will download it again.
–
—
–
– [9] FOR YOUR VERY IMPORTANT FILES
–
—
–
– If the file is irreplaceable, I nevertheless recommend that you do not consider OneDrive to be your only backup.
–
– OneDrive is primarily a Cloud storage and synchronization service.
–
– For an extremely important document, the ideal solution is to have at least one additional independent copy, for example:
– an external drive;
– another Cloud service;
– a NAS;
– a real offline backup.
–
– This also protects against accidental deletion, account problems, or file corruption.
–
—
–
– [10] SUMMARY
–
—
–
– To keep a file in OneDrive while recovering the corresponding space on your SSD:
–
– 1] Put the file in OneDrive.
– 2] Wait for synchronization to finish.
– 3] Optionally verify its presence at https://onedrive.live.com/
– 4] Right-click it in Windows File Explorer.
– 5] Choose “Free up space”.
– 6] Verify that the icon becomes a blue cloud.
–
– DO NOT CLICK “DELETE”.
–
– “Free up space” = keep the file in OneDrive and remove its local copy.
– “Delete” = delete the file, with that deletion potentially being synchronized to OneDrive.
–
—
–
– OFFICIAL MICROSOFT SOURCE:
– https://support.microsoft.com/en-us/onedrive/save-disk-space-with-onedrive-files-on-demand-for-windows
–
—
–
———————————
———————————
———————————
———————————
–
—
–
– ‼️ SSD Analysis Software to Find Large Files and Free Up Space ‼️
–
– Verification: August 24, 2026.
– Objective: analyze the contents of an SSD, HDD, external drive, or other volume in order to quickly identify the files and folders that use the most space.
– Important: this is an analysis of disk space usage. These programs do not replace a SMART tool or SSD health diagnostic software.
–
—
–
—
–
– [1] WINDOWS — THE BEST FREE SOFTWARE
–
—
–
– [1.1] WIZTREE — MY Nº 1 RECOMMENDATION FOR WINDOWS
–
– Type: free for personal use; paid license available.
– OS: Windows.
– Main function: extremely fast drive analysis and sorting of files and folders by size.
– Display: folder tree + graphical Treemap.
– Allows you to directly find the largest files.
– Also allows you to search for duplicate files.
– Analyzes SSDs, HDDs, external devices, and network drives.
– A portable version is available.
– WizTree notably uses the NTFS MFT when available, which explains its very high speed on NTFS volumes.
– Official link:
– https://diskanalyzer.com/
– Official download:
– https://diskanalyzer.com/download
– Licenses / pricing:
– https://diskanalyzer.com/donate
– Rating: EXCELLENT.
– For personal use on Windows, this is the first program I recommend trying.
–
—
–
– [1.2] TREESIZE FREE
–
– Type: free.
– OS: Windows.
– Developer: JAM Software.
– Immediately displays folder sizes in a tree structure similar to Windows File Explorer.
– Graphical Treemap display.
– Allows you to identify folders and files that consume a lot of space.
– Can analyze an entire drive or only a folder.
– A portable version of TreeSize Free is also available.
– Official link:
– https://www.jam-software.com/treesize_free
– General TreeSize page:
– https://www.jam-software.com/treesize
– Rating: EXCELLENT.
– TreeSize is especially easy to understand if you prefer a presentation similar to Windows File Explorer.
–
—
–
– [1.3] WINDIRSTAT
–
– Type: free and Open Source.
– License: GPL.
– OS: Windows.
– Analyzes drives and folders.
– Sorts files and folders by size.
– Includes a very practical graphical Treemap representation.
– Allows you to quickly identify large files and folders.
– Official link:
– https://windirstat.net/
– Official download:
– https://windirstat.net/download.html
– Rating: EXCELLENT.
– A very good choice if you want free and Open Source software.
–
—
–
– [1.4] FOLDERSIZES FREE
–
– Type: free version available.
– OS: Windows.
– Developer: Key Metric Software.
– Analyzes file and folder sizes.
– Searches for large files.
– Searches for old, temporary, or duplicate files depending on the edition.
– Graphical displays and detailed reports.
– Official link:
– https://www.foldersizes.com/
– Download:
– https://www.foldersizes.com/download
– Pricing:
– https://www.foldersizes.com/order
– Rating: VERY GOOD.
–
—
–
– [1.5] RANKING OF FREE SOFTWARE FOR WINDOWS
–
– 1] WizTree — best overall choice and extremely fast.
– 2] TreeSize Free — excellent and very easy to use.
– 3] WinDirStat — excellent free and Open Source choice.
– 4] FolderSizes Free — very comprehensive.
–
—
–
—
–
– [2] WINDOWS — PAID SOFTWARE OR PAID EDITIONS
–
—
–
– [2.1] TREESIZE PERSONAL / PROFESSIONAL
–
– Type: paid.
– OS: Windows.
– Additional features depending on the edition: advanced search, duplicate files, reports, automation, export, and professional features.
– Official editions page:
– https://www.jam-software.com/treesize/editions.shtml
– Official TreeSize page:
– https://www.jam-software.com/treesize
–
—
–
– [2.2] FOLDERSIZES PERSONAL / PRO
–
– Type: paid.
– OS: Windows.
– Additional features depending on the edition: advanced reports, automation, scheduling, command line, and storage administration features.
– Official page:
– https://www.foldersizes.com/
– Official pricing:
– https://www.foldersizes.com/order
– Personal Edition:
– https://www.foldersizes.com/order/personaledition
–
—
–
– [2.3] WIZTREE SUPPORTER / COMMERCIAL
–
– Type: optional paid license to support the project or for commercial use.
– Official licenses page:
– https://diskanalyzer.com/donate
–
—
–
—
–
– [3] LINUX — FREE SOFTWARE
–
—
–
– [3.1] FILELIGHT
–
– Type: free and Open Source.
– Project: KDE.
– Main OS: Linux.
– Analyzes local, remote, or removable drives.
– Displays folders graphically to visualize used space.
– Official link:
– https://apps.kde.org/filelight/
– Rating: EXCELLENT for KDE and Linux with a graphical interface.
–
—
–
– [3.2] GNOME DISK USAGE ANALYZER / BAOBAB
–
– Type: free and Open Source.
– OS: Linux.
– Project: GNOME.
– Analyzes folders and storage devices.
– Displays a graphical representation of folder sizes.
– Official link:
– https://apps.gnome.org/Baobab/
– Rating: EXCELLENT for GNOME.
–
—
–
– [3.3] NCDU
–
– Full name: NCurses Disk Usage.
– Type: free and Open Source.
– Interface: terminal.
– OS: Linux and other Unix/POSIX-like systems.
– Excellent for finding the largest folders from a terminal.
– Very lightweight.
– Very useful on servers, Raspberry Pi, and machines accessed through SSH.
– Official link:
– https://dev.yorhel.nl/ncdu
– Rating: EXCELLENT FOR THE TERMINAL.
–
—
–
– [3.4] RANKING FOR LINUX
–
– 1] Filelight — best graphical choice under KDE.
– 2] GNOME Disk Usage Analyzer / Baobab — best graphical choice under GNOME.
– 3] ncdu — best choice for terminal, SSH, and Raspberry Pi.
–
—
–
—
–
– [4] macOS — FREE AND PAID SOFTWARE
–
—
–
– [4.1] GRANDPERSPECTIVE
–
– Type: free and Open Source.
– OS: macOS.
– Uses a graphical Treemap in which each rectangle represents a file.
– Very useful for immediately identifying files that use a huge amount of space.
– Official link:
– https://grandperspectiv.sourceforge.net/
– Rating: EXCELLENT FREE CHOICE FOR macOS.
–
—
–
– [4.2] OMNIDISKSWEEPER
–
– Type: free.
– Developer: The Omni Group.
– OS: macOS.
– Displays the files on a drive by sorting them from largest to smallest.
– Official link:
– https://www.omnigroup.com/more
– Rating: SIMPLE AND EFFECTIVE.
–
—
–
– [4.3] DAISYDISK
–
– Type: paid with a trial mode.
– OS: macOS.
– Interactive graphical representation of used space.
– Analyzes volumes in order to locate large files and folders.
– Official link:
– https://daisydiskapp.com/
– Official pricing:
– https://daisydiskapp.com/support/pricing/
– Rating: EXCELLENT PAID CHOICE FOR macOS.
–
—
–
—
–
– [5] MAIN RECOMMENDATIONS
–
—
–
– FOR WINDOWS:
– 1] WizTree — Nº 1 choice.
– 2] TreeSize Free — Nº 2 choice.
– 3] WinDirStat — Nº 3 choice and an excellent Open Source option.
– 4] FolderSizes Free — Nº 4 choice.
–
– FOR LINUX:
– 1] Filelight for KDE.
– 2] GNOME Disk Usage Analyzer / Baobab for GNOME.
– 3] ncdu for terminal, SSH, or Raspberry Pi.
–
– FOR macOS:
– 1] GrandPerspective if you want a free solution.
– 2] DaisyDisk if you accept paid software.
– 3] OmniDiskSweeper for a very simple free solution.
–
—
–
—
–
– [6] FOR A WINDOWS PC: RECOMMENDED METHOD
–
—
–
– Start with WizTree.
– Run WizTree as administrator so that it can see as many accessible folders as possible.
– Select the SSD.
– Start the scan.
– Then sort the results by size.
– Give priority to folders using several dozen or hundreds of GB.
– Also use the file view to identify the largest individual files.
– Check personal folders and game libraries first.
– Examples:
– C:\Users\[User]\Downloads
– C:\Users\[User]\Videos
– C:\Users\[User]\Documents
– C:\Users\[User]\Pictures
– Steam libraries.
– GOG libraries.
– Epic Games libraries.
– ISO images.
– Virtual machines.
– Backups.
– ZIP, 7Z, and RAR archives.
– Old installers.
– Video captures and recordings.
– Temporary files.
– Program caches.
–
– For a second independent analysis, then use TreeSize Free or WinDirStat.
–
—
–
—
–
– [7] IMPORTANT WARNING BEFORE DELETING FILES
–
—
–
– Never automatically delete a file simply because it is large.
– These programs mainly indicate where the used space is located; they cannot always determine whether a file is essential to the system or to an application.
– Do not manually delete items from C:\Windows simply because they take up a lot of space.
– Do not arbitrarily delete C:\Program Files.
– Do not arbitrarily delete C:\Program Files (x86).
– Do not arbitrarily delete the contents of C:\ProgramData.
– Also be careful with AppData folders.
– Be careful with pagefile.sys.
– Be careful with hiberfil.sys.
– Be careful with the WinSxS and Windows Installer folders.
– For applications and games that are no longer needed, it is generally better to uninstall them normally rather than directly deleting their folders.
–
—
–
—
–
– [8] CONCLUSION
–
—
–
– If the specific objective is simply to find out which files or folders are taking up all the space on a Windows SSD, WizTree is the first recommended choice.
– TreeSize Free is an excellent alternative with a more traditional interface.
– WinDirStat is an excellent free and Open Source alternative.
– It is generally not necessary to purchase software for this basic need.
–
—
–
———————————
———————————
———————————
———————————
–
—
–
– IN FRENCH:
–
—
–
———————————
———————————
———————————
———————————
–
‼️ Libérer de l’espace de stockage : logiciels d’analyse SSD et OneDrive Cloud ‼️MERCI‼️
–
———————————
———————————
–
—
–
– SOUS-TITRE
–
– Guide bilingue complet sur Microsoft OneDrive Fichiers à la demande, les fichiers uniquement en ligne, l’analyse de l’espace des SSD et HDD, les analyseurs de disque gratuits et payants pour Windows, Linux et macOS, la détection des fichiers et dossiers volumineux, les recommandations de nettoyage du stockage et les précautions pour supprimer des fichiers en toute sécurité.
–
—
–
———————————
———————————
———————————
———————————
–
—
–
– INTRODUCTION
–
– Ce document est un guide bilingue complet consacré à la gestion de l’espace de stockage, à l’identification des fichiers et dossiers volumineux et à la libération sécurisée d’espace sur les SSD, HDD et autres périphériques de stockage sans supprimer inutilement des données importantes.
–
– Il commence par un guide pratique consacré à Microsoft OneDrive Cloud et à la fonction Fichiers à la demande, qui explique comment conserver des fichiers et des dossiers complets uniquement en ligne tout en supprimant leurs copies locales d’un SSD. Il explique la vérification de la synchronisation, l’option « Libérer de l’espace », la différence importante entre libérer de l’espace et supprimer un fichier, les icônes d’état OneDrive, ce qui se produit lorsqu’un fichier uniquement en ligne est ouvert à nouveau et pourquoi les fichiers importants doivent malgré tout disposer d’une sauvegarde indépendante.
–
– Le document présente ensuite des logiciels gratuits et payants d’analyse de l’espace disque pour Windows, Linux et macOS. Les outils présentés comprennent WizTree, TreeSize Free et ses éditions payantes, WinDirStat, FolderSizes, Filelight, GNOME Disk Usage Analyzer / Baobab, ncdu, GrandPerspective, OmniDiskSweeper et DaisyDisk. Leurs fonctions principales, leurs plateformes, leurs sites officiels, leurs téléchargements, leurs options de licence et leurs usages recommandés sont présentés afin d’aider les utilisateurs à choisir la solution la mieux adaptée.
–
– Il fournit également des recommandations spécifiques à chaque OS, une méthode pratique pour analyser un PC Windows, des exemples de dossiers et de types de fichiers qui utilisent fréquemment beaucoup d’espace de stockage, ainsi que des précautions importantes avant de supprimer des fichiers. Une attention particulière est portée aux emplacements et fichiers système Windows tels que Windows, Program Files, ProgramData, AppData, pagefile.sys, hiberfil.sys, WinSxS et Windows Installer, qui ne doivent jamais être supprimés simplement parce qu’un analyseur de disque indique qu’ils occupent beaucoup d’espace.
–
– Le but de ce document est de proposer une méthode pratique et plus sûre pour récupérer de la capacité de stockage : déterminer d’abord ce qui utilise l’espace, puis décider si les fichiers doivent rester stockés localement, être placés uniquement en ligne dans OneDrive, être archivés ou être supprimés en toute sécurité. Les logiciels d’analyse de disque décrits dans ce document servent à analyser l’utilisation du stockage et à localiser les fichiers et dossiers volumineux ; ils ne remplacent pas la surveillance SMART ni un logiciel dédié de diagnostic de santé des SSD.
–
—
–
———————————
———————————
———————————
———————————
–
—
–
– IN FRENCH:
–
—
–
– PRÉAMBULE
–
– ‼️ Microsoft OneDrive Cloud : garder les fichiers uniquement en ligne et libérer de l’espace SSD ‼️
–
– Oui, c’est possible et c’est exactement à cela que sert la fonction « Fichiers à la demande » de OneDrive.
–
—
–
—
–
– [1] LA MÉTHODE LA PLUS SIMPLE
–
—
–
– 1] Vérifie d’abord que ton fichier se trouve bien dans ton dossier OneDrive.
– Exemple :
– C:\Users\[Ton nom]\OneDrive\Documents\MonFichier.zip
–
– 2] Attends que OneDrive ait complètement synchronisé le fichier avec le Cloud.
–
– 3] Par sécurité, tu peux aussi ouvrir :
– https://onedrive.live.com/
–
– 4] Vérifie que le fichier apparaît bien dans ton OneDrive en ligne.
–
– 5] Dans l’Explorateur de fichiers Windows, retourne dans ton dossier OneDrive.
–
– 6] Fais un clic droit sur le fichier ou le dossier concerné.
–
– 7] Choisis :
– « Libérer de l’espace »
–
– Sur certaines configurations de Windows 11, cette commande peut se trouver dans le menu OneDrive ou dans les options supplémentaires du menu contextuel.
–
– 8] OneDrive retire alors la copie complète du fichier stockée localement sur ton SSD.
–
– 9] LE FICHIER N’EST PAS SUPPRIMÉ DE ONEDRIVE.
–
– 10] Il reste visible dans l’Explorateur de fichiers, mais devient un fichier disponible uniquement en ligne.
–
– 11] Une petite icône représentant un NUAGE BLEU doit apparaître à côté du fichier.
–
– NUAGE BLEU = fichier disponible uniquement en ligne.
– Il n’occupe pratiquement plus d’espace de stockage sur ton SSD.
– Il sera téléchargé automatiquement si tu l’ouvres à nouveau.
–
—
–
– [2] TRÈS IMPORTANT : NE PAS UTILISER « SUPPRIMER »
–
—
–
– Il faut bien choisir :
– « Libérer de l’espace »
–
– Il ne faut PAS choisir :
– « Supprimer »
–
– Si tu supprimes normalement un fichier situé dans ton dossier OneDrive, OneDrive synchronise cette suppression et le fichier peut également être supprimé du Cloud.
–
– « Libérer de l’espace » est différent :
– le fichier reste dans OneDrive ;
– seule sa copie locale complète est retirée du SSD.
–
—
–
– [3] COMMENT RECONNAÎTRE L’ÉTAT DU FICHIER
–
—
–
– NUAGE BLEU :
– Disponible uniquement en ligne.
– C’est l’état que tu recherches pour gagner de la place sur le SSD.
–
– COCHE VERTE :
– Le fichier a été téléchargé et est actuellement disponible localement.
– Il utilise donc de l’espace sur le SSD.
–
– CERCLE VERT AVEC COCHE BLANCHE :
– « Toujours conserver sur cet appareil » est activé.
– Le fichier doit rester téléchargé sur ton SSD.
– Ce n’est donc PAS l’option à utiliser lorsque tu veux économiser de l’espace.
–
—
–
– [4] SI LE FICHIER N’EST PAS ENCORE DANS ONEDRIVE
–
—
–
– Voici la méthode que je recommande pour éviter toute perte :
–
– 1] Copie d’abord le fichier dans ton dossier OneDrive.
–
– 2] Laisse OneDrive terminer complètement l’envoi du fichier.
–
– 3] Va sur :
– https://onedrive.live.com/
–
– 4] Vérifie que le fichier est réellement présent et accessible en ligne.
–
– 5] Retourne ensuite dans l’Explorateur de fichiers.
–
– 6] Clic droit sur le fichier.
–
– 7] Clique sur :
– « Libérer de l’espace »
–
– 8] Vérifie que l’icône devient un nuage bleu.
–
– À ce moment-là, le fichier est conservé dans OneDrive et sa copie locale complète ne prend plus de place sur le SSD.
–
—
–
– [5] TU PEUX FAIRE LA MÊME CHOSE AVEC UN DOSSIER COMPLET
–
—
–
– Tu n’es pas obligé de le faire fichier par fichier.
–
– Par exemple, si tu possèdes un dossier :
– OneDrive\Archives
–
– contenant 100 Go de fichiers :
–
– clic droit sur « Archives » ;
– puis :
– « Libérer de l’espace »
–
– OneDrive peut alors rendre les fichiers du dossier disponibles uniquement en ligne et récupérer une grande partie de ces 100 Go sur ton SSD.
–
—
–
– [6] ATTENTION LORSQUE TU OUVRES LE FICHIER
–
—
–
– Si tu ouvres un fichier représenté par le nuage bleu, OneDrive doit le télécharger pour que Windows ou ton logiciel puisse l’utiliser.
–
– Il redevient alors disponible localement et recommence à utiliser de l’espace sur le SSD.
–
– Une fois que tu as terminé avec ce fichier, tu peux refaire :
– clic droit ;
– « Libérer de l’espace ».
–
– Il retournera à l’état « uniquement en ligne ».
–
—
–
– [7] VÉRIFIER QUE « FICHIERS À LA DEMANDE » EST ACTIF
–
—
–
– Sur les versions actuelles de OneDrive, « Fichiers à la demande » est normalement activé par défaut.
–
– Si « Libérer de l’espace » n’apparaît pas :
–
– 1] Clique sur l’icône OneDrive dans la zone de notification de Windows.
–
– 2] Ouvre les paramètres OneDrive.
–
– 3] Va dans :
– « Synchronisation et sauvegarde ».
–
– 4] Ouvre les paramètres avancés.
–
– 5] Vérifie les options concernant « Fichiers à la demande » et la gestion de l’espace disque.
–
—
–
– [8] EXEMPLE CONCRET
–
—
–
– Imaginons que tu possèdes :
– MonArchive.zip
–
– Taille :
– 80 Go.
–
– État initial :
– fichier dans OneDrive ;
– fichier également téléchargé sur ton SSD ;
– environ 80 Go utilisés localement.
–
– Tu fais :
– clic droit sur MonArchive.zip ;
– « Libérer de l’espace ».
–
– Résultat :
– MonArchive.zip reste dans ton compte OneDrive ;
– MonArchive.zip reste visible dans l’Explorateur de fichiers ;
– une icône de nuage bleu apparaît ;
– les 80 Go de données locales peuvent être libérés ;
– si tu veux utiliser le fichier par la suite, OneDrive le téléchargera à nouveau.
–
—
–
– [9] POUR TES FICHIERS TRÈS IMPORTANTS
–
—
–
– Si le fichier est irremplaçable, je te conseille néanmoins de ne pas considérer OneDrive comme ton unique sauvegarde.
–
– OneDrive est principalement un service de stockage et de synchronisation Cloud.
–
– Pour un document extrêmement important, l’idéal reste d’avoir au moins une deuxième copie indépendante, par exemple :
– un disque externe ;
– un autre service Cloud ;
– un NAS ;
– une véritable sauvegarde hors ligne.
–
– Cela protège également contre une suppression accidentelle, un problème de compte ou une corruption de fichier.
–
—
–
– [10] RÉSUMÉ
–
—
–
– Pour conserver un fichier dans OneDrive tout en récupérant l’espace correspondant sur ton SSD :
–
– 1] Mets le fichier dans OneDrive.
– 2] Attends la fin de la synchronisation.
– 3] Vérifie éventuellement sa présence sur https://onedrive.live.com/
– 4] Fais un clic droit dessus dans l’Explorateur Windows.
– 5] Choisis « Libérer de l’espace ».
– 6] Vérifie que l’icône devient un nuage bleu.
–
– NE CLIQUE PAS SUR « SUPPRIMER ».
–
– « Libérer de l’espace » = conserver le fichier dans OneDrive et retirer sa copie locale.
– « Supprimer » = supprimer le fichier, avec synchronisation possible de cette suppression vers OneDrive.
–
—
–
– SOURCE OFFICIELLE MICROSOFT :
– https://support.microsoft.com/fr-fr/onedrive/save-disk-space-with-onedrive-files-on-demand-for-windows
–
—
–
———————————
———————————
———————————
———————————
–
—
–
– ‼️ LOGICIELS GRATUITS ET PAYANTS POUR ANALYSER L’ESPACE UTILISÉ SUR LES SSD, TROUVER LES FICHIERS ET DOSSIERS VOLUMINEUX ET LIBÉRER DE L’ESPACE ‼️
–
– Vérification : 24 août 2026.
– Objectif : analyser le contenu d’un SSD, HDD, disque externe ou autre volume afin d’identifier rapidement les fichiers et dossiers qui occupent le plus d’espace.
– Important : il s’agit ici d’une analyse de l’utilisation de l’espace disque. Ces logiciels ne remplacent pas un outil SMART ou un logiciel de diagnostic de santé du SSD.
–
—
–
—
–
– [1] WINDOWS — LES MEILLEURS LOGICIELS GRATUITS
–
—
–
– [1.1] WIZTREE — MA RECOMMANDATION Nº 1 POUR WINDOWS
–
– Type : gratuit pour usage personnel ; licence payante disponible.
– OS : Windows.
– Fonction principale : analyse extrêmement rapide des disques et tri des fichiers et dossiers par taille.
– Affichage : arborescence + Treemap graphique.
– Permet de trouver directement les fichiers les plus volumineux.
– Permet également de rechercher les fichiers en double.
– Analyse les SSD, HDD, périphériques externes et lecteurs réseau.
– Une version portable est disponible.
– WizTree utilise notamment la MFT de NTFS lorsqu’elle est disponible, ce qui explique sa très grande rapidité sur les volumes NTFS.
– Lien officiel :
– https://diskanalyzer.com/
– Téléchargement officiel :
– https://diskanalyzer.com/download
– Licences / tarifs :
– https://diskanalyzer.com/donate
– Avis : EXCELLENT.
– Pour une utilisation personnelle sous Windows, c’est le premier logiciel que je conseille d’essayer.
–
—
–
– [1.2] TREESIZE FREE
–
– Type : gratuit.
– OS : Windows.
– Développeur : JAM Software.
– Affiche immédiatement la taille des dossiers dans une arborescence proche de l’Explorateur Windows.
– Affichage graphique Treemap.
– Permet d’identifier les dossiers et fichiers qui consomment beaucoup d’espace.
– Peut analyser un disque complet ou seulement un dossier.
– Une version portable de TreeSize Free existe également.
– Lien officiel :
– https://www.jam-software.com/treesize_free
– Page générale TreeSize :
– https://www.jam-software.com/treesize
– Avis : EXCELLENT.
– TreeSize est particulièrement facile à comprendre si tu préfères une présentation proche de l’Explorateur de fichiers Windows.
–
—
–
– [1.3] WINDIRSTAT
–
– Type : gratuit et Open Source.
– Licence : GPL.
– OS : Windows.
– Analyse les disques et dossiers.
– Trie les fichiers et dossiers selon leur taille.
– Dispose d’une représentation graphique Treemap très pratique.
– Permet de repérer rapidement les fichiers et dossiers volumineux.
– Lien officiel :
– https://windirstat.net/
– Téléchargement officiel :
– https://windirstat.net/download.html
– Avis : EXCELLENT.
– Très bon choix si tu veux un logiciel libre et Open Source.
–
—
–
– [1.4] FOLDERSIZES FREE
–
– Type : version gratuite disponible.
– OS : Windows.
– Développeur : Key Metric Software.
– Analyse les tailles des fichiers et dossiers.
– Recherche les fichiers volumineux.
– Recherche les fichiers anciens, temporaires ou en double selon l’édition.
– Affichages graphiques et rapports détaillés.
– Lien officiel :
– https://www.foldersizes.com/
– Téléchargement :
– https://www.foldersizes.com/download
– Tarifs :
– https://www.foldersizes.com/order
– Avis : TRÈS BON.
–
—
–
– [1.5] TRI DES LOGICIELS GRATUITS POUR WINDOWS
–
– 1] WizTree — meilleur choix général et extrêmement rapide.
– 2] TreeSize Free — excellent et très simple à utiliser.
– 3] WinDirStat — excellent choix gratuit et Open Source.
– 4] FolderSizes Free — très complet.
–
—
–
—
–
– [2] WINDOWS — LOGICIELS PAYANTS OU ÉDITIONS PAYANTES
–
—
–
– [2.1] TREESIZE PERSONAL / PROFESSIONAL
–
– Type : payant.
– OS : Windows.
– Fonctions supplémentaires selon l’édition : recherche avancée, fichiers en double, rapports, automatisation, export et fonctions professionnelles.
– Page officielle des éditions :
– https://www.jam-software.com/treesize/editions.shtml
– Page officielle TreeSize :
– https://www.jam-software.com/treesize
–
—
–
– [2.2] FOLDERSIZES PERSONAL / PRO
–
– Type : payant.
– OS : Windows.
– Fonctions supplémentaires selon l’édition : rapports avancés, automatisation, planification, ligne de commande et fonctions d’administration du stockage.
– Page officielle :
– https://www.foldersizes.com/
– Tarifs officiels :
– https://www.foldersizes.com/order
– Édition personnelle :
– https://www.foldersizes.com/order/personaledition
–
—
–
– [2.3] WIZTREE SUPPORTER / COMMERCIAL
–
– Type : licence payante facultative pour soutenir le projet ou pour une utilisation commerciale.
– Page officielle des licences :
– https://diskanalyzer.com/donate
–
—
–
—
–
– [3] LINUX — LOGICIELS GRATUITS
–
—
–
– [3.1] FILELIGHT
–
– Type : gratuit et Open Source.
– Projet : KDE.
– OS principal : Linux.
– Analyse les disques locaux, distants ou amovibles.
– Présente les dossiers sous forme graphique pour visualiser l’espace occupé.
– Lien officiel :
– https://apps.kde.org/filelight/
– Avis : EXCELLENT pour KDE et Linux avec interface graphique.
–
—
–
– [3.2] GNOME DISK USAGE ANALYZER / BAOBAB
–
– Type : gratuit et Open Source.
– OS : Linux.
– Projet : GNOME.
– Analyse les dossiers et périphériques de stockage.
– Affiche une représentation graphique de la taille des dossiers.
– Lien officiel :
– https://apps.gnome.org/Baobab/
– Avis : EXCELLENT pour GNOME.
–
—
–
– [3.3] NCDU
–
– Nom complet : NCurses Disk Usage.
– Type : gratuit et Open Source.
– Interface : terminal.
– OS : Linux et autres systèmes de type Unix/POSIX.
– Excellent pour trouver les dossiers les plus volumineux depuis un terminal.
– Très léger.
– Très utile sur les serveurs, Raspberry Pi et machines accessibles par SSH.
– Lien officiel :
– https://dev.yorhel.nl/ncdu
– Avis : EXCELLENT POUR LE TERMINAL.
–
—
–
– [3.4] TRI POUR LINUX
–
– 1] Filelight — meilleur choix graphique sous KDE.
– 2] GNOME Disk Usage Analyzer / Baobab — meilleur choix graphique sous GNOME.
– 3] ncdu — meilleur choix en terminal, SSH et Raspberry Pi.
–
—
–
—
–
– [4] macOS — LOGICIELS GRATUITS ET PAYANTS
–
—
–
– [4.1] GRANDPERSPECTIVE
–
– Type : gratuit et Open Source.
– OS : macOS.
– Utilise une Treemap graphique dans laquelle chaque rectangle représente un fichier.
– Très pratique pour repérer immédiatement les fichiers occupant énormément de place.
– Lien officiel :
– https://grandperspectiv.sourceforge.net/
– Avis : EXCELLENT CHOIX GRATUIT POUR macOS.
–
—
–
– [4.2] OMNIDISKSWEEPER
–
– Type : gratuit.
– Développeur : The Omni Group.
– OS : macOS.
– Affiche les fichiers présents sur un disque en les triant du plus volumineux au plus petit.
– Lien officiel :
– https://www.omnigroup.com/more
– Avis : SIMPLE ET EFFICACE.
–
—
–
– [4.3] DAISYDISK
–
– Type : payant avec mode d’essai.
– OS : macOS.
– Représentation graphique interactive de l’espace utilisé.
– Analyse les volumes afin de localiser les fichiers et dossiers volumineux.
– Lien officiel :
– https://daisydiskapp.com/
– Tarifs officiels :
– https://daisydiskapp.com/support/pricing/
– Avis : EXCELLENT CHOIX PAYANT POUR macOS.
–
—
–
—
–
– [5] RECOMMANDATIONS PRINCIPALES
–
—
–
– POUR WINDOWS :
– 1] WizTree — choix Nº 1.
– 2] TreeSize Free — choix Nº 2.
– 3] WinDirStat — choix Nº 3 et excellent choix Open Source.
– 4] FolderSizes Free — choix Nº 4.
–
– POUR LINUX :
– 1] Filelight pour KDE.
– 2] GNOME Disk Usage Analyzer / Baobab pour GNOME.
– 3] ncdu pour le terminal, SSH ou Raspberry Pi.
–
– POUR macOS :
– 1] GrandPerspective si tu veux du gratuit.
– 2] DaisyDisk si tu acceptes un logiciel payant.
– 3] OmniDiskSweeper pour une solution gratuite très simple.
–
—
–
—
–
– [6] POUR UN PC WINDOWS : MÉTHODE CONSEILLÉE
–
—
–
– Commence par WizTree.
– Lance WizTree en tant qu’administrateur afin qu’il puisse voir le maximum de dossiers accessibles.
– Sélectionne le SSD.
– Lance l’analyse.
– Trie ensuite les résultats selon la taille.
– Regarde en priorité les dossiers occupant plusieurs dizaines ou centaines de Go.
– Utilise également la vue des fichiers pour identifier les fichiers individuels les plus volumineux.
– Vérifie en priorité les dossiers personnels et bibliothèques de jeux.
– Exemples :
– C:\Users\[Utilisateur]\Downloads
– C:\Users\[Utilisateur]\Videos
– C:\Users\[Utilisateur]\Documents
– C:\Users\[Utilisateur]\Pictures
– Bibliothèques Steam.
– Bibliothèques GOG.
– Bibliothèques Epic Games.
– Images ISO.
– Machines virtuelles.
– Sauvegardes.
– Archives ZIP, 7Z et RAR.
– Anciens programmes d’installation.
– Captures et enregistrements vidéo.
– Fichiers temporaires.
– Caches de programmes.
–
– Pour une deuxième analyse indépendante, utilise ensuite TreeSize Free ou WinDirStat.
–
—
–
—
–
– [7] PRÉCAUTIONS IMPORTANTES AVANT DE SUPPRIMER DES FICHIERS
–
—
–
– Ne supprime jamais automatiquement un fichier uniquement parce qu’il est volumineux.
– Ces logiciels indiquent principalement où se trouve l’espace occupé ; ils ne peuvent pas toujours déterminer si un fichier est indispensable au système ou à une application.
– Ne supprime pas manuellement des éléments dans C:\Windows simplement parce qu’ils prennent beaucoup de place.
– Ne supprime pas arbitrairement C:\Program Files.
– Ne supprime pas arbitrairement C:\Program Files (x86).
– Ne supprime pas arbitrairement le contenu de C:\ProgramData.
– Attention également aux dossiers AppData.
– Attention à pagefile.sys.
– Attention à hiberfil.sys.
– Attention aux dossiers WinSxS et Windows Installer.
– Pour les applications et jeux devenus inutiles, il vaut généralement mieux les désinstaller normalement plutôt que supprimer directement leur dossier.
–
—
–
—
–
– [8] CONCLUSION
–
—
–
– Si l’objectif précis est simplement de savoir quels fichiers ou dossiers prennent toute la place sur un SSD Windows, WizTree est le premier choix recommandé.
– TreeSize Free constitue une excellente alternative avec une interface plus traditionnelle.
– WinDirStat est une excellente alternative gratuite et Open Source.
– Il n’est généralement pas nécessaire d’acheter un logiciel pour ce besoin de base.
–
—
–
———————————
———————————
———————————
———————————
‼️‼️ THANK YOU VERY MUCH ‼️‼️
‼️‼️ MERCI BEAUCOUP ‼️‼️
———————————
———————————
———————————
———————————
– KEYWORDS: SSD, OneDrive, Files On-Demand, Disk Space Analysis, Large Files, Storage Cleanup, Windows, Linux, macOS, Disk Analyzers
– MOTS-CLÉS : SSD, OneDrive, Fichiers à la demande, Analyse de l’espace disque, Fichiers volumineux, Nettoyage du stockage, Windows, Linux, macOS, Analyseurs de disque


Leave a Reply